


The sticker
The sticker has a transparent transfer foil on top and a paper support as a base.

The assembly
01. Preparing the sticker
The sticker needs to be rolled off on a clean flat surface, table or floor. With a clean cloth or credit card, press hard to ensure the fixation of the print on the transfer foil.

02. Preparing the wall
The wall must be dry, without traces of grease, adhesive or silicone. The stickers cannot be mounted on the walls painted with paint containing Teflon or acrylic paint. If the wall is freshly painted, wait two weeks before mounting the sticker.
With a clean and dry cloth, dust the wall where the sticker is to be mounted.

03. Fixing the sticker
With adhesive paper tape, secure the sticker on the wall, in the desired area. We recommend fixing at the top, in 2 or 3 points, depending on the size of the sticker as well as on the side, left / right, if necessary. We recommend the adhesive tape used by painters that has a weaker adhesive and does not damage the wall when removed. The mounting of the sticker is done from top to bottom.

04. Peel off the paper support
With the sticker fixed to the wall with adhesive tape, peel off the white paper support from the transfer foil and sticker on a length of about 10 cm and fold it on the wall.

05. Ensure the fixation
With a dry cloth or a credit card, glide over the surface glued to the wall several times to ensure the fixation. The transfer foil on top protects the sticker from scratches throughout the assembly.

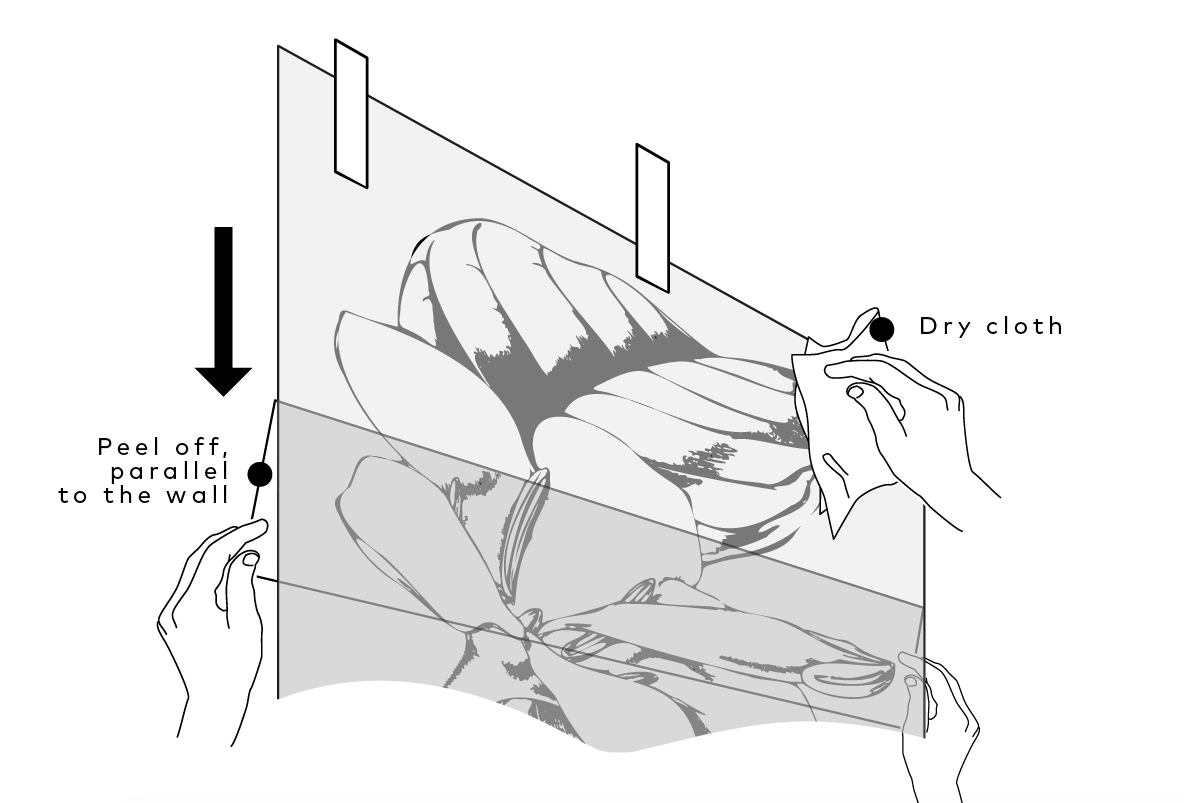
06. Peel off with both hands
Continue to peel off the white paper support from the sticker, gradually, with light movements, parallel to the wall with both hands, allowing the sticker to stick to the wall. With a dry cloth or a credit card glide over the surface glued to the wall several times to ensure fixation. Continue until the wall sticker is completely glued.
07. Detach the transfer foil
Start by peeling off the adhesive paper tape. Then, from the top, start to detach the transfer foil, with light movements, parallel to the wall with both hands, taking care not to peel off the wall sticker. Pay special attention to the thinner elements in the print.

08. Wipe with the cloth
After complete removal of the transfer foil, wipe with a clean cloth over the print for fixing and smoothing. Do not use the credit card because it is possible to scratch and damage the print.

